" If you don’t back up your phone today, then you will cry in another day."
It’s a popular saying online, which indicates how important it’s to back up your iPhone at a regular time frame. The data stored on the iPhone is much more valuable then the price of device itself. So you have to be very careful to protect the data on your iPhone. Fortunately, as an iPhone user, Apple has provided two convenient ways to help users back up your iPhone either with iTunes or iCloud in case of data lost by accident.
Before proceeding to the tutorial, supposed you already have a backup yet. Or it’s just a waste of time reading the rest part of this article. In here, I will introduce three simple methods on how to recover lost or deleted data from previous iCloud or iTunes backup with the adward-winning iPhone Backup Extractor.
iPhone Backup Extractor is a powerful desktop utility designed to extract iPhone content and files individually from iPhone backup files, including contacts, text messages, photos, music, video, eBooks and documents. The program first scans the backup and lists found items on the main screen. Then the control hands over to you, deciding which item or files being restored. What’s more, it works on both Windows and Mac OS X. In the following section, I will show you how to recover lost or deleted files in three ways on a Mac. However, the same applies to the Windows computer. Supported device models and iOS version are as follows:
Part I: How to Extract Data from iTunes Backup
Part II: How to Extract Data from iCloud Backup
Part III: No iPhone Backup, How to Recover Data Directly from iPhone
iTunes is the preferred way to back up iPhone. We go first with iTunes backup. The reason Why I don't use iTunes here is that it will recover all of the things from the backup. However, we only need to extract a few ones in most of the cases. That's why I recommend to use iPhone Backup Extractor here. Please download and install the program first.


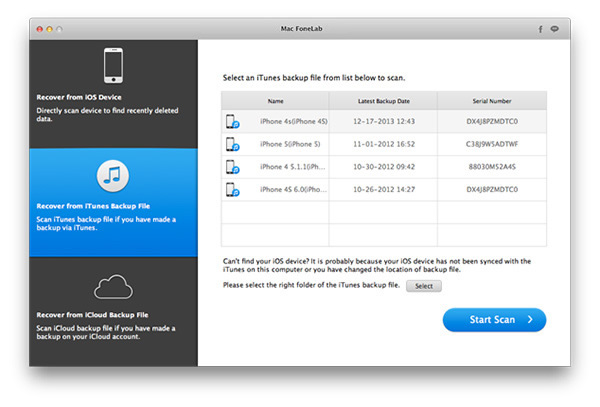
Select the "Recover from iTunes Backup File" from the startup. The program will detect your device. Then list all available iTunes backup files as below. Choose the right backup and click "Start Scan".

It takes a while to let the program scan and analysis the backup. When the scanning finished, all the available data will be shown in categories. Fortunately, It allows users to preview the files before making a decision. When files being selected, click "Recover" button, they'll be extracted to your computer. That's all. Simple enough, right?
iCloud is more comfortable for backup if you had a good wireless connection. It automatically back up your device when Wi-Fi is connected. And it becomes the most popular way for iPhone backup. Here is how to extract files from iCloud.
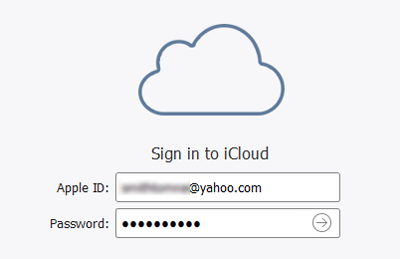
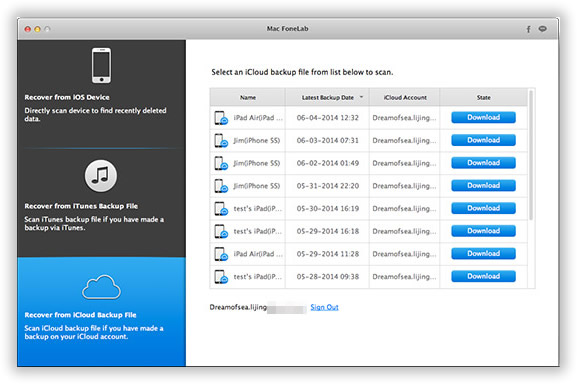
Select Recover from iCloud Backup File after launching the program. Log into your account via Apple ID. The connection is encrypted so don't worry about the security. Then the program will scan the backup files from the cloud. A list of backups will be displayed on the screen. Click the download button to start downloading.

Choose the downloaded backup file and click Start Scan, then all possible data will be listed after scanning. Preview the files and choose the ones you want to recover. Then click Recover. Please be patient, it takes a few minutes to finish the process.

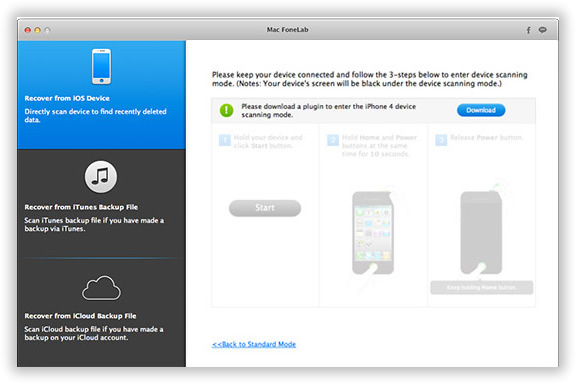
When you don't have any backup file, it's still possible to retrieve data directly from the iPhone, first you need to download and install this program on your computer. Then connect your device to computer via USB cable. After identifying your device by the program, select the "Recover from iOS Device" option on the main interface.

The program will deeply scan your iPhone's internal memory and cache space. For just a few minutes, all the deleted data will be listed in categories as below, then choose selected files to preview. When check is done, click "recover" button to start to recover process.
Through the above article, you see how easy to recover iPhone files both from backup or directly from the device. So there is no need to worry about data lost when bad things come to your iPhone. You are free to choose the way you prefer to get back your data as many as you can. One more tip, if the above method doesn't work for you, you can also check iSeePassword iPhone Backup Extractor to restore deleted files from iTunes Backup. I tested it on two Windows machines and it works great as it claims in the post.

